Showing posts with label Strategies. Show all posts

Friday, January 27, 2017

Candy Land


So about 2 maybe 3 years ago I was trying to come up with some new ways to keep my students engaged in math class on the days where...well frankly...they just need to practice.  We all have those days and honestly, they are the days that both my students and myself dread.  It's boring for me, they get cranky, and everyone is just off task.  To them it feels like "busy work", which it's not, they need to master the skill before they can apply it, but that's how they feel.  One evening by some miracle I came up with life-sized Candy Land.   Before you get all excited there is no Mr. Mint, Princess Lolly, Lord Licorice, or Queen Frostine.  I laminated colored squares of paper that I put in the pattern on the floor.  There is a start and finish square, and the students get to pick their own game piece (I'll talk about those later!).  They draw cards out of a bucket with problems on one side, and either a single colored square or double colored squares on the other.  If the students answer the problem correctly they move ahead that many colored squares.  If they answer it wrong, they don't move at all.  The team to make it to the end wins!

Here's how it looks...


It's pretty basic but my students absolutely love to play it.  I have watched students jumping up and down to come to math class because we are playing it. When I first started the winning team would get candy bars of their choice.  After a few years of playing, I have made a few adjustments to the game.


I have added chips that can make them advance or have to go back, and if they are super lucky they get a go back to start chip.  Instead of just the winning team getting candy I decided to put chips on specific squares around the room.  The first team to land on that square after answering a problem correctly removes the chip and turns it in at the end of the hour for candy.  This way those students who might are further behind won't give up so quickly.  

The game pieces are the best part of this whole game, and the part they will race to class and fight over getting.  They are just random things I have in my classroom and many of them I have no clue where they came from.  The bucket of pieces keeps growing each year and they are getting better and better. 


The colored squares have been used by a ton of teacher in my building.  What's funny is what game pieces they come up with to use.  Our Nursing Program borrowed it and used fake organs as their pieces and it was AWESOME!  I hope to add to the game the Rainbow Trail and the Gumdrop Pass, it's what they keep asking for.  


Thursday, June 30, 2016

Trigonometry Task Cards

Towards the end of this past school year, my Geometry students were working on Right Triangle Trig.  Trig is not an easy concept for them to grasp and I had to think of ways to help make it easier for them to understand the process.  Trig has always been a challenge for my students and each time I teach it I go into this unit hoping for the best (because I love it!) but fearing the worst (They don't love it!).  They always get so frustrated and give up so quickly because they view it as being too difficult for them to learn.  In the end, many see the light and realize it wasn't as bad as they thought it would be, while some don't budge and remain struggling.

I had originally made these task cards for my class to use as practice this year but it was something I never had the time to finish up.  The end of this school year was a rough one and everyone was doing their best to keep their heads above water.  So needless to say I never got to use them but plan to this year with my new Geometry students.

Had I actually had the chance to use them I would have used them in one of the following ways:

Option #1 Students work in teams (my room has 4 large tables) and each team would get a task card from each page, work it out together and pass them around until they did all 4 then we would pass out the next page.  All students would complete all problems.

Option #2 Put the cards randomly though out my classroom, have students work in pairs and work their way around the room until they have completed all the problems.

Option #3 Put all cards in a bucket, have students work in small groups, they come up and draw a card out of the bucket and work it out with their team. The only downside to this option is that there is a chance some groups might not get a card from each page so they won't get practice from that kind of problem.

Well here are the cards...Let me know if you have any other ideas for options.  If you use them with your students let me know how it works out!


If you would like your own set here are the links.  If you blog or tweet about my task cards please reference where you got them from.


Monday, August 17, 2015

Assigned Seating Problems and Groupings


When it comes to seating arrangements in my classroom I'm a groups/pods/tables/etc. kind of teacher.  I try to instill in my students a sense of collaboration and teamwork.  I love when they work together to solve problems and enjoy seeing students helping and supporting one another.  The only issue I find with groups is that I tend to only have the students work with those in their group.  I hate deciding who is going to work with who and I needed to find a different way to do things.

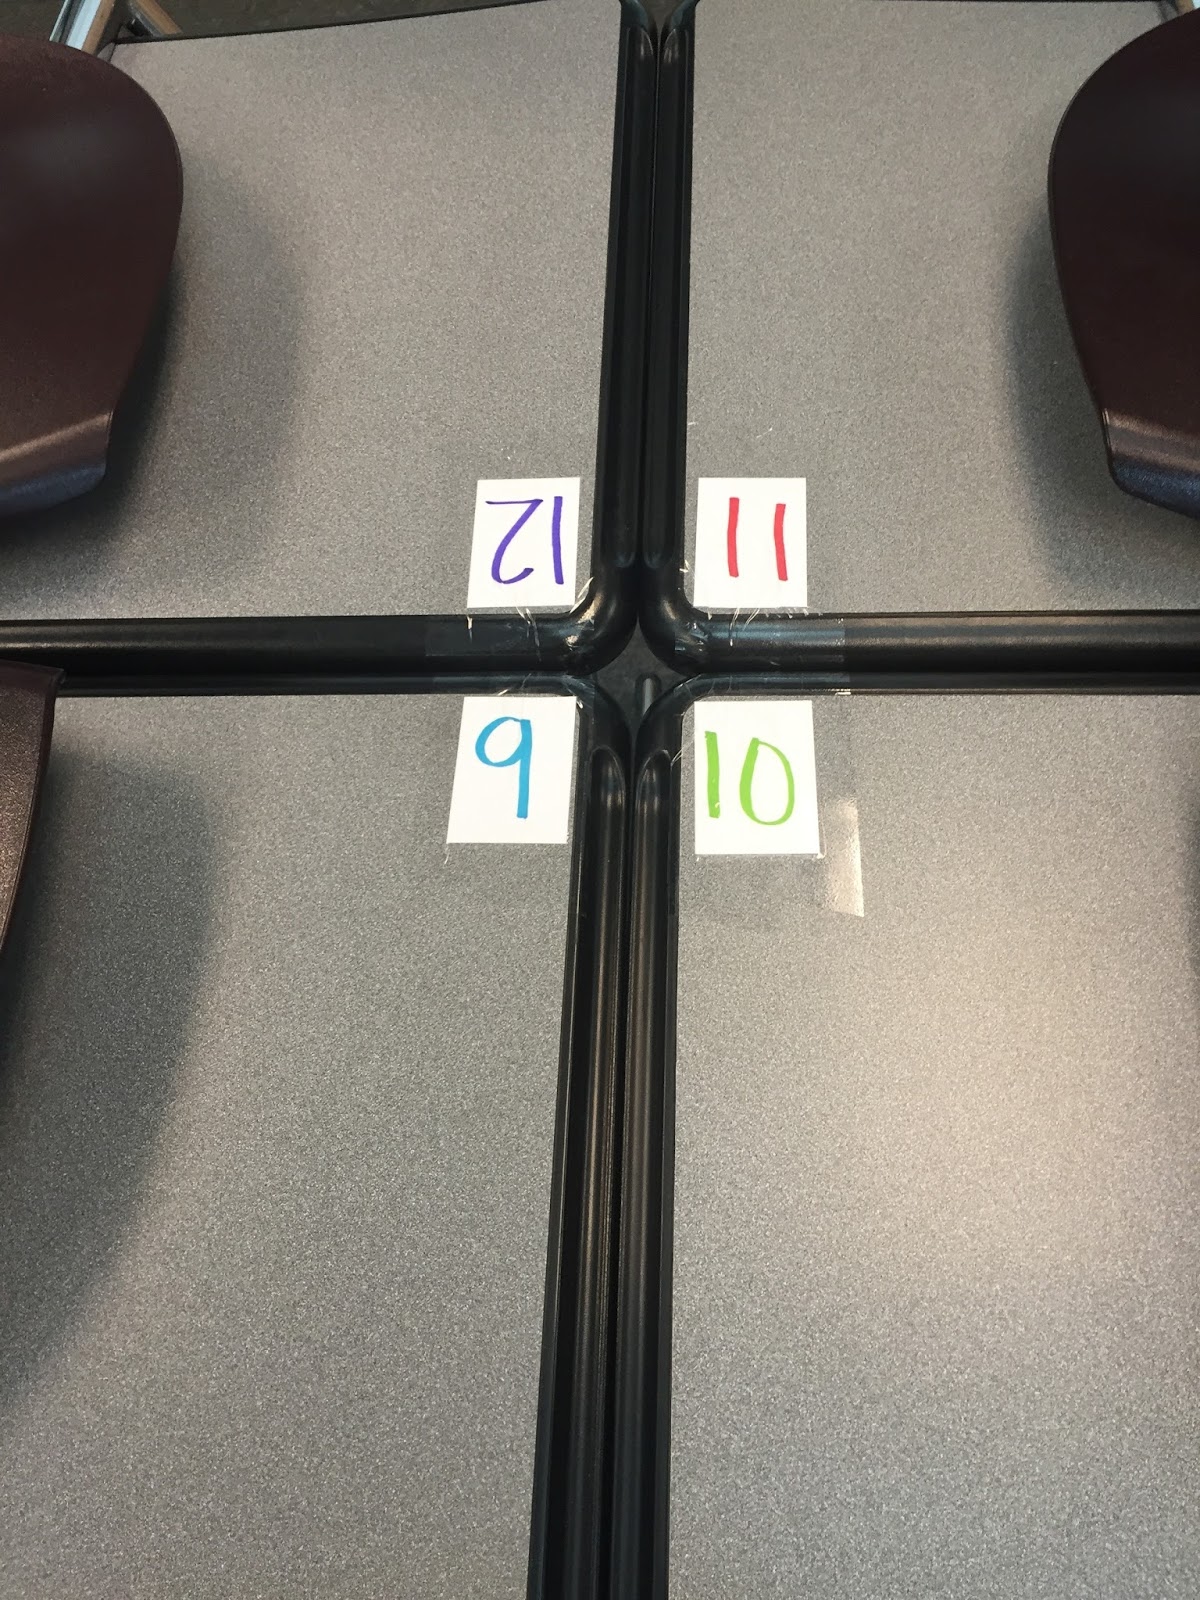
A fellow coworker of mine numbers her desks, this way when it is time to assign students to a seat she gives them a number and they find their desk rather than trying to give them directions to their desk which they inevitably never locate correctly.  So I decided to do that this year, but being the teacher that I am I had to make it different and my own (not that there was anything wrong with her method, but she's an English teacher so she didn't see the Math possibilities behind this genius idea).  

Here is what I did…

I have 24 desks in my room and I put them into 6 groups of 4 desks.  Each desk is numbered 1-24 using a blue, green, red, purple pattern (repeated for all 6 groups).  I then created a seating chart like I normally would but put their number and color in each box.  I made sure that for each of my classes I had the same number of kids sitting in each color seat.  

On the 1st day of school, I always greet the students in the hallway making sure they are in the right class and helping others find their way around.  HERE IS THE MATH BEHIND THIS GENIUS IDEA!! This year I will be giving each of my students an index card that has a math problem on it with their name.  The answer to their problem lets them know what number desk they are assigned to.  I'm excited about starting with math as soon as they walk in the door!  I differentiated the problems on the cards based on the ability level of my students (the ones I've had before) I focused on solving linear equations but for my freshmen I gave them Order of Operation problems since this is a skill I know their former teacher was working on with them.  Some of my other ideas to shake up my groups is to have them work with their same color peers, maybe do even and odds, greens with purples and reds with blues, etc.  Can't wait to see how this goes on Wednesday for our 1st day of school!

Thursday, July 24, 2014

Whiteboard Folders

The unit my students struggle with the most in Algebra is Writing Linear Equations.  Even though the concept of only needing the Slope and Y-intercept to write the equation is a pretty straight forward concept my students struggle because of all the different types of problems they come across.  They are never to sure which method they need to use.

Since all of my students are at different levels, some understand the more basic problems but struggle with the harder ones, and some are completely lost.  This is defiantly a unit I have to differentiate for my students.  So I came up with these whiteboard folders for all of the different Writing Linear Equation problems they will come across.

Supplies you'll need:
Colored Paper, Laminator, Manilla Folder, Scissors, Hot Glue Gun, Marker


How to make the folders…

1st: I hot laminated colored paper.
2nd: Cut almost all of the front cover of the folders off, leaving about 3 inches (this give the kids enough room on the laminated paper to do the work).
3rd: Hot glued the laminated colored paper to the inside of the folder.


4th: On the cut front cover I numbered and wrote out the problems, one type of problem per folder.
5th: Cut the front cover so each problem is it's own flap.


6th: On the inside of the flap write the answer to each problem.


7th: The folder tab has what type of problems they are on it.


I made folders for problems when you have the Slope and Y-Intercept, Slope and One Point, From a Graph, Two Points, Parallel Lines and Perpendicular Lines.  The students wrote on the laminated paper using a dry erase marker and wipe them clean.  These folders allowed students to practice and get immediate feedback by checking their own answers.  I've also used them where students pair up, one is the teacher the other is the student.  While one student works the problem out on a regular whiteboard the "teacher" can check the "students" answers using the folder.

Sunday, September 8, 2013

Transformations

It has been a long time since I've written a post that I hope I still have readers?  I have so many posts to write to wrap up last school year. Hopefully I can get them all done in the next week or two, because I have so many exciting new things about THIS school year to report on! (We just finished week 3 of the 2013-2014 school year)

Mid year last year we did transformations in Geometry, but since I know it's a huge portion of CCSS for Geometry this year, I thought I would write about what we did since many are starting this school year off with it.

This page of our Geometry ISN covered Reflections, Rotations, and Translations.  The left page went over what each of them meant and had an example.

The right side had the definitions along with a practice problem for each type.

The students easily caught on to Reflections and Translations, but had a more difficult time with Rotations.  To get students to understand how rotations work and why a shape ends in the position it does took some time.
To help them see how shapes rotate I gave them the graph paper in the pictures and we drew different shapes on each graph.  I then gave them each a blank transparency and Vis-A-Vis marker.  Students placed the transparency over their graph paper, and traced the shape with the Vis-A-Vis marker. They would put their finger on the point of rotation and then rotate the transparency the correct number of degrees and in the correct direction.  The outline on the transparency shows the students where the shape will end up.  Then they would draw the shape on the graph paper.  After doing the four on the page, they felt a lot more comfortable with rotations.  Some no longer needed the transparency to do the work, while others relied on it a little longer.  By the end they were doing rotations without any problems.

Monday, June 24, 2013

Station Activities

At the end of each year I like to think about what worked and what didn't work for my students so I can improve for next year.  Since I'm the only Special Education Math and Science teacher for my building/district, I have the same kids for 3-4 years.  So reflecting back really helps because I can see the improvement in my students and myself from one year to the next.

So what I have found out about this past school year is that my students absolutely LOVE their ISN and Station Activities.  There are many things they enjoyed about this year but those are their most favorite, and are the most effective.  

Here is how I create my station activities.  At the end of each day I give my students an exit ticket, and the exit tickets are based on the current unit objectives.  Sometimes if I know my students will need to use a previously taught skills I will incorporate that into the exit tickets as well.  These formative assessments allow me to see where each of my students are at; what they know and what they don't know.  Based off of that information I create my station activities.  

For this example we were just starting to work on writing equations in slope intercept form and some of objectives were:

I can calculate the slope given a graph, table, or two points.  
I can determine the slope and y-intercept of a line given the graph of a line.
I can write an equation in slope intercept form given the slope and y-intercept.

My students were given the exit ticket after we went over the ISN pages and did some whole group practice.  When they were finished I checked them to see which problems they got right/wrong.  For this class I had students who got problems incorrect from each objective, so I created stations based on each objective.  


This time I assigned them specific stations they had to complete based on the problems they got wrong from the exit ticket.  If there was time they could go back and do the other stations for practice.  Other times I have had stations for a test review and each table had an activity based on each of the unit objectives.  When I do this they are expected to finish all of the stations.

The main reasons why I like stations is because they get the students up and moving around the room, it allows me to work with individual students, and lastly they get excited because it isn't just a boring worksheet.

**I used Expo Neon Dry Erase Markers on my black lab tables, they wipe away easily with a wet rag. If you don't have black tables you can use regular colored Expo Dry Erase Markers on tables or student desks.**  


Friday, April 5, 2013

Quadrilaterals

So I thought over spring break I would catch up on all of my blogging, find cool new activities to do with my math students, and create some new ISN pages.  Well needless to say that never happened...

We covered Quadrilaterals in Geometry class, however we only went with regular quadrilaterals for the time being.

My students love charts, and when I say love I really mean LOVE!!  It's weird how excited they can get about a chart, but whatever will make them happy.  So to cover the characteristics of the different types of regular quadrilaterals I had my students fill in the following chart.


We started off drawing a picture of each shape and from there the students told me what to write in both the "Angles" and "Sides" boxes.  It turned into a whole class discussion where all I did was fill in my chart as they told me what to put in it.

My students will admit that they are not the best artists (frankly neither am I ), so made these shapes on the computer for them to cut out and tape into their notebooks.  Students used rulers and protractors to help them figure out what angles and sides were congruent. As they discovered characteristics of the quadrilaterals as a class we wrote the information below and to the side of each of the shapes.  We did go through in the beginning identifying each of the shapes by name, then color coding their different characteristics (color chart at the top) that they had discovered through their exploration of the 6 quadrilaterals.


**Update: Both pages have been change to reflect the correct information for Kite**


Friday, March 1, 2013

Functions Continued...

I love my students and wouldn't change them for the world, but so often they have a hard time with math that has multiple steps.

We were working on function and they needed practice, but not just sit at their desks and work on a worksheet practice.  So I decided to make these huge posters, one poster for each of the three steps for graphing a function.  

This activity got my students up and moving around the room while still working on practice.  The few feet between each step made a big difference.  It gave them time to stop thinking about what they just did and focus on what they are to do next.  To them it made each problem seem like three easy tasks.


I had three sets of these posters and even though it was only three problems worth of practice they got each of them correct.

At the end of the hour I gave them an exit ticket over these types of problems and found that most of my students were ready to move on the next day.  I did have to work with one student who has been struggling all year, but this activity gave me the time to do just that.

Saturday, January 19, 2013

My Love of Concept Maps

The Whole Concept Map
I have a secret love for concept mapping.  Not only do I enjoy making them but I truly enjoy watching a class of students all create different concept maps on the exact same topic.  It's so interesting to see how each individual interprets a broad topic in such different ways.  The best part about it is that since it is how a person makes sense of a topic, they aren't done incorrectly....well for the most part.
Top Left

Concept mapping is generally done with information in boxes or circles connected by lines that are labeled.  This type of activity is easily done in both Science and Social Studies classes, I usually use them in the Science classes
that I teach.  However, this year I decided to have my basic math kids concept map our entire Fractions Unit.

Now for all of my basic math students this is the first time they had ever done a concept map, and many of them struggled through it and they came out a mess.  Which for me is GREAT!  They are suppose to be messy.
 
Bottom Left

These are pictures of the one I had created.  I will update this post later with some student created concept maps, but some were hard to read/understand in person, and it was way worse in a picture.

In the past I have always done them on paper, and many times I still do.  I enjoy hanging them up around my room and having students keep adding to it each day.

Two years ago I got a classroom set of netbook computers and we were asked to implement them into our classrooms as much as possible.  I started off by taking something I already do in my classroom and do it on the computer instead.
Concept mapping was the first thing I started with.

Top Right
There are many different concept mapping tools out there, many of them free!  The few that I have used in my room and that my students enjoy are Concept Board, Popplet, and Mindomo.


My students prefer those three over any of the others because they can insert pictures into them.  Many of the concept mapping/mind mapping tools out there don't allow you to put pictures into them.   These three are also extremely easy to use.  Also some of them limit how many maps you can make with a free account.  After awhile a student can delete their old ones but mine like to keep theirs.


Bottom Right
Do you concept map/mind map in your classroom?  If so how do you feel about them?  How about your students?


Wednesday, October 24, 2012

Sorting Activities

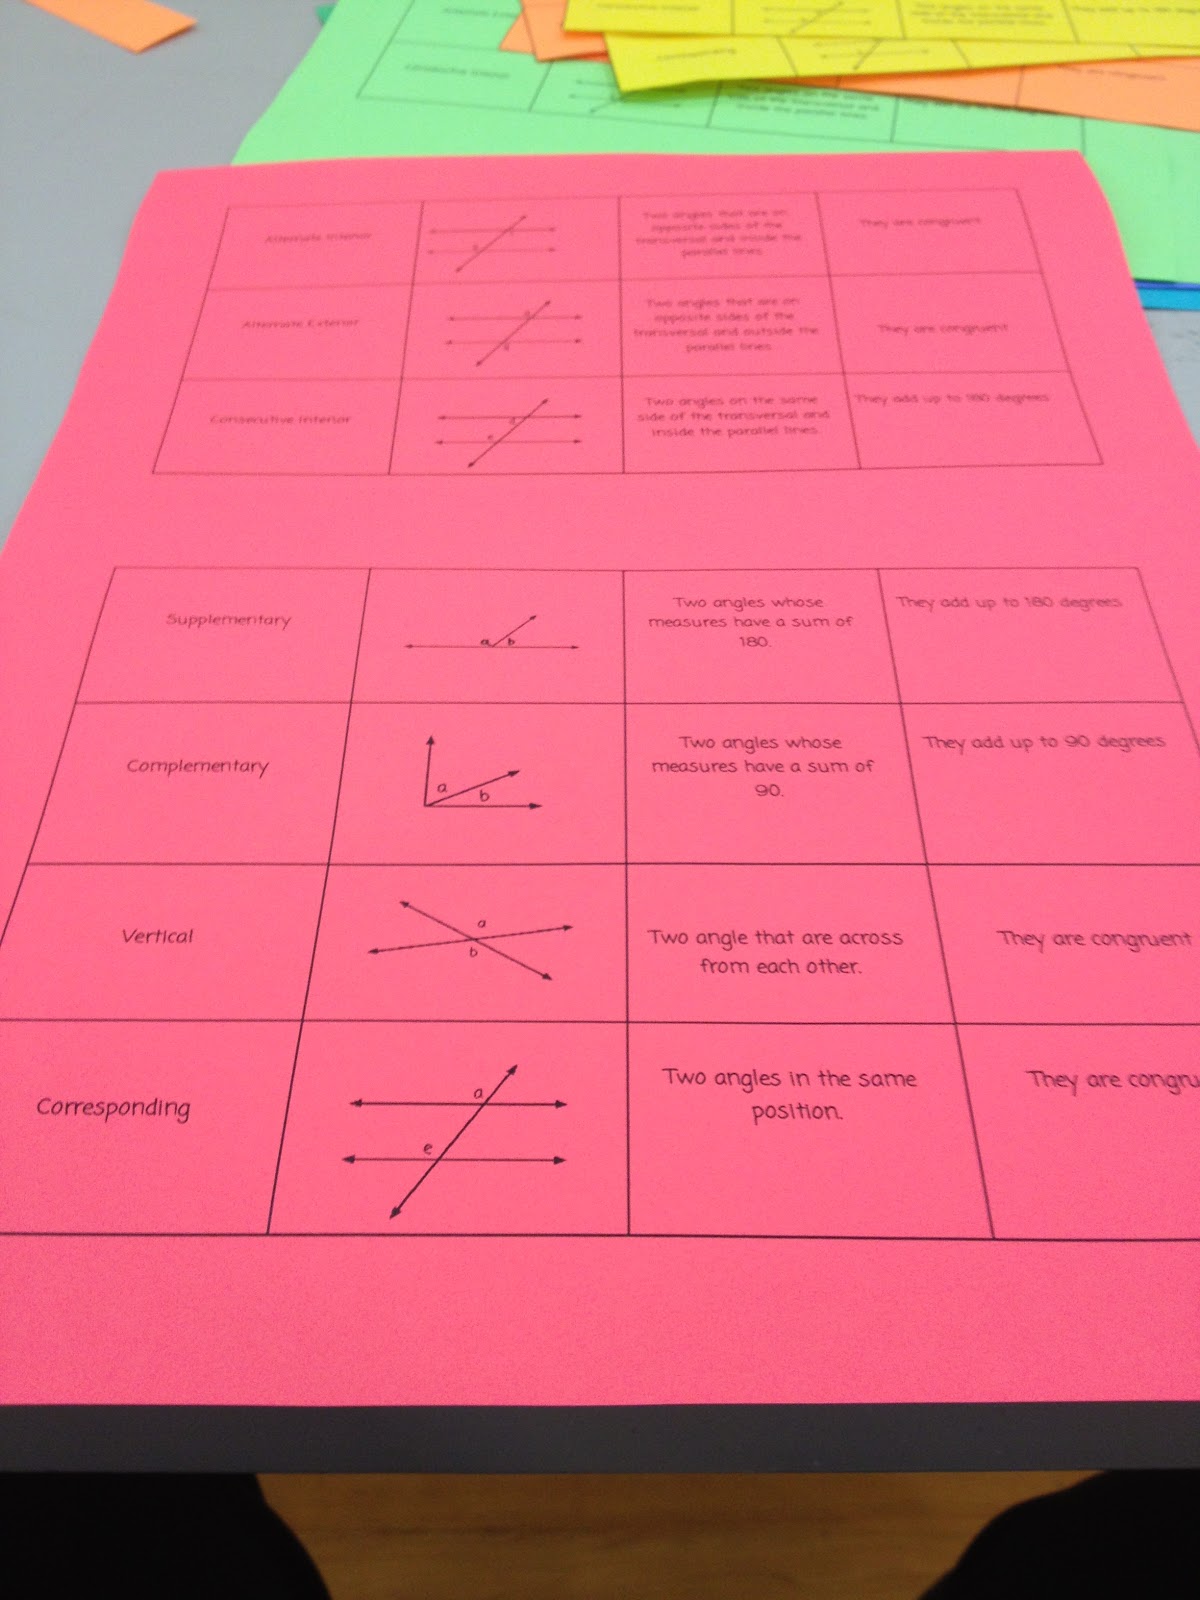
One of my favorite things to have the students do to help them memorize information is to create a sorting activity. I will have them do the sorting activity a few times through out the unit to help them remember the information.

I start off by creating a document with a table.  In this case I created an activity to help my students learn the different angle pairs in Geometry.  One box is the name, another is a picture/example, next is the definition, and the final box is the relationship.

Once I am finished typing it up, I copy it on different colored sheets of paper, cut them up and paper clip them together.  Sometimes I have them laminated so that they can be used over and over again.

The colored paper in my book is a MUST!  Often my students will drop a piece on the floor and when they are colored it's easier to know which clip they belong in.  I use to do them on white paper but would spend a lot of time trying to figure out which clip the dropped piece would belong in.


I have created problem sorts as well where one card had a math problem and the other one had the answer. These were usually like 10 problems long. It allows students to get immediate feedback to see if they are doing it correctly.  They know it was done correctly if they can find their answer, otherwise they know to go back and work it out again.

 Another sort I have made was on the scientific method.   One half of the table was the steps and the other side was a part of a lab write up that I broke down into parts.  The students had to read the part of the lab and determine which step that was. 

Sorts can be used for so many different topics...Parts of a story, Historical Events with their causes and effects, cooking equipment with their names, lab equipment with their names, etc.

If you use sorts please share your ideas!
Related Posts Plugin for WordPress, Blogger...