Showing posts with label Geometry. Show all posts

Saturday, August 5, 2017

Goals for 2017-2018


At the start of every year I always set some sort of goal for myself and this year I find my goal area needs to be on mistakes.  As teachers we always say "It's okay to make mistakes", "Mistakes mean we are trying" and "Mistakes are how we learn" but for me that's about as far as it went.  So are we really saying mistakes are ok?  Does this really encourage students to take more risks and to make mistakes?

This past school year I cam across the video below on how this teacher grades her tests.  It is worth watching but if you don't have time here is a quick but "does no justice" recap: She highlights the mistakes that students make on their tests, no grade is put on the test, grades are put in their online grade book the day AFTER they have received the test back, and she celebrates her favorite mistakes.  Students work together to recognize where they have made mistakes and work to correct them.  


I just love the idea of only highlighting the mistakes made on the test.  This way students are more focused on the learning and content rather than what grade they received.   She said it perfectly when she talks about how students get their test back, look at the grade, and then throw it away never to look at it again.  When this happens I feel we are saying that the material we taught really wasn't that important, and that the grade they received is acceptable, even when it may not be.

My most favorite part is how she celebrates mistakes.  She displays a photocopy of a mistake that a student or many students made, and calls them her favorite mistakes.  The class works in their groups and then together as a whole to identify the mistake that was made and then how to correct it.  She also brings to the students attention parts that may be wrong by highlighting them, but she doesn't necessarily take points off for it.

I've been teaching for 10 years, this will be my 11th year, and this past year when students only focused on their grades it really started to get to me.  I knew I needed to change something about how I was running my class.  Standards Based Grading was something I brought into my room about 5 years ago and it helped get the kids to focus more on the learning but the level put at the top of the paper was still sparking the conversations I was hoping to eliminate.

So my goal for the 2017-2018 school year is to highlight mistakes, enter grades in the following day, celebrate my favorite mistakes, and hopefully get my students to focus more on the math and less on their grades.  Wish me luck and we will see how this year goes!


Thursday, June 30, 2016

Trigonometry Task Cards

Towards the end of this past school year, my Geometry students were working on Right Triangle Trig.  Trig is not an easy concept for them to grasp and I had to think of ways to help make it easier for them to understand the process.  Trig has always been a challenge for my students and each time I teach it I go into this unit hoping for the best (because I love it!) but fearing the worst (They don't love it!).  They always get so frustrated and give up so quickly because they view it as being too difficult for them to learn.  In the end, many see the light and realize it wasn't as bad as they thought it would be, while some don't budge and remain struggling.

I had originally made these task cards for my class to use as practice this year but it was something I never had the time to finish up.  The end of this school year was a rough one and everyone was doing their best to keep their heads above water.  So needless to say I never got to use them but plan to this year with my new Geometry students.

Had I actually had the chance to use them I would have used them in one of the following ways:

Option #1 Students work in teams (my room has 4 large tables) and each team would get a task card from each page, work it out together and pass them around until they did all 4 then we would pass out the next page.  All students would complete all problems.

Option #2 Put the cards randomly though out my classroom, have students work in pairs and work their way around the room until they have completed all the problems.

Option #3 Put all cards in a bucket, have students work in small groups, they come up and draw a card out of the bucket and work it out with their team. The only downside to this option is that there is a chance some groups might not get a card from each page so they won't get practice from that kind of problem.

Well here are the cards...Let me know if you have any other ideas for options.  If you use them with your students let me know how it works out!


If you would like your own set here are the links.  If you blog or tweet about my task cards please reference where you got them from.


Monday, August 17, 2015

Assigned Seating Problems and Groupings


When it comes to seating arrangements in my classroom I'm a groups/pods/tables/etc. kind of teacher.  I try to instill in my students a sense of collaboration and teamwork.  I love when they work together to solve problems and enjoy seeing students helping and supporting one another.  The only issue I find with groups is that I tend to only have the students work with those in their group.  I hate deciding who is going to work with who and I needed to find a different way to do things.

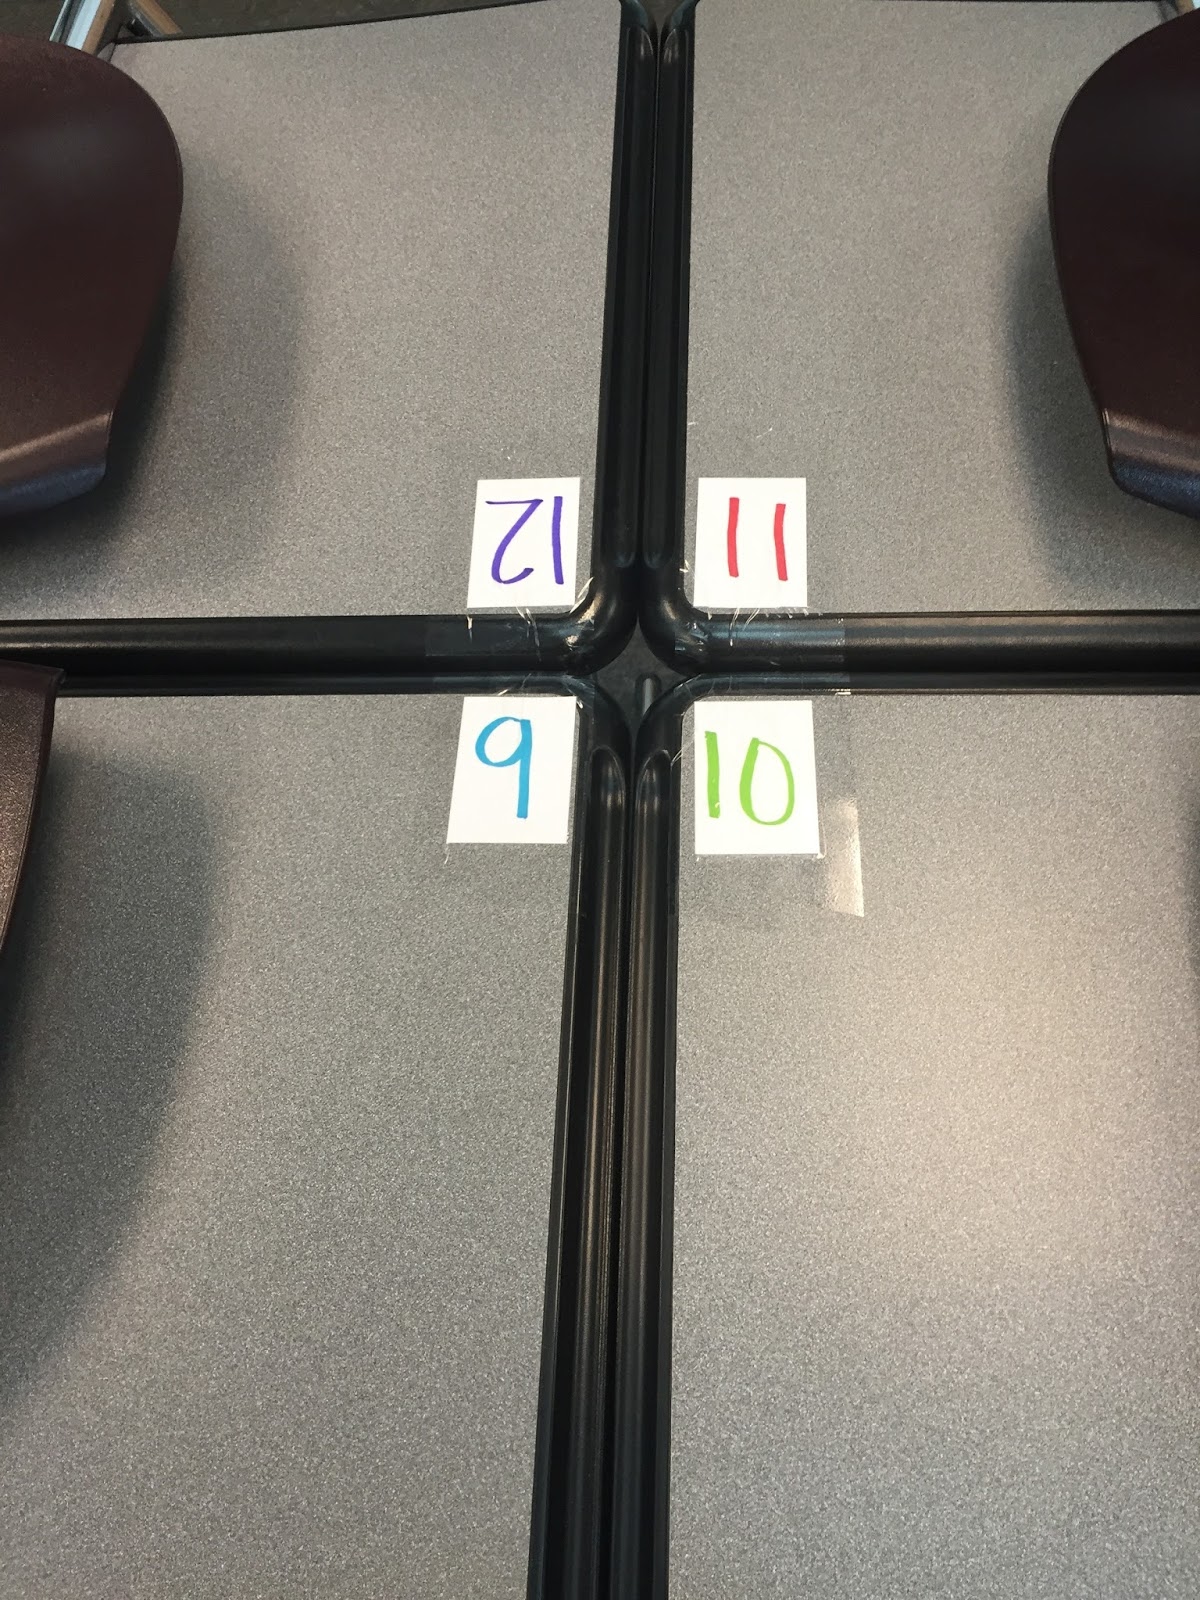
A fellow coworker of mine numbers her desks, this way when it is time to assign students to a seat she gives them a number and they find their desk rather than trying to give them directions to their desk which they inevitably never locate correctly.  So I decided to do that this year, but being the teacher that I am I had to make it different and my own (not that there was anything wrong with her method, but she's an English teacher so she didn't see the Math possibilities behind this genius idea).  

Here is what I did…

I have 24 desks in my room and I put them into 6 groups of 4 desks.  Each desk is numbered 1-24 using a blue, green, red, purple pattern (repeated for all 6 groups).  I then created a seating chart like I normally would but put their number and color in each box.  I made sure that for each of my classes I had the same number of kids sitting in each color seat.  

On the 1st day of school, I always greet the students in the hallway making sure they are in the right class and helping others find their way around.  HERE IS THE MATH BEHIND THIS GENIUS IDEA!! This year I will be giving each of my students an index card that has a math problem on it with their name.  The answer to their problem lets them know what number desk they are assigned to.  I'm excited about starting with math as soon as they walk in the door!  I differentiated the problems on the cards based on the ability level of my students (the ones I've had before) I focused on solving linear equations but for my freshmen I gave them Order of Operation problems since this is a skill I know their former teacher was working on with them.  Some of my other ideas to shake up my groups is to have them work with their same color peers, maybe do even and odds, greens with purples and reds with blues, etc.  Can't wait to see how this goes on Wednesday for our 1st day of school!

Sunday, August 9, 2015

Geometry Curriculum Outline

Recently I have received a few emails and comments from teachers who are teaching Geometry for Special Education students for the first time this year and need some help! I figured this post would be a great one to write since the beginning of the year is starting August 17th for me and I'm back to teaching Geometry this year. I'm so excited and can't wait to teach this class. Of all the math classes a math teacher can teach, Geometry happens to be my most favorite.

 Just a little background into my students and what my Geometry class looks like...Every year my students come into my Geometry class with no knowledge of Geometry, I mean NOTHING! They know shapes like squares, circles, rectangles, and triangles but anything beyond that they don't know. When I ask them what makes a square a square I usually get the deer in the headlights look from them. So when I teach Geometry it has to go down all the way to the very basics. Many ask me if I'm doing Common Core with them? My answer is always YES and NO. Yes, we do as much Common Core as we can and I always push my students to what they refer to ask their "exploding point", but when your students come in with no Geometry knowledge or skills it's hard to say we are 100% doing High School Common Core Geometry all the time. When it comes to Special Education students you have to teach them where they are at, not necessarily what grade it says they are in.

This was a common saying in my math classes this past year and I'm sure it will be again this year. It killed me every time one of them would say it.

This past school year I was informed I would be teaching Geometry again this upcoming school year, and since the group I will be having I've had in the past, I knew my class needed to be organized in a different way. So our school's Math Specialist (she's amazing) and I sat down and looked at the Common Core HS standards and the level of my students, we came up with this curriculum outline.  


So this is what I plan on following this year.  Each unit covers the same/similar skills but breaks it down by the different shapes.  So in each unit the students will know what to expect, but they will have to apply it to the each new shape that is introduced to them.  I'm hoping they will start to see patterns and make connections they might not have otherwise made.  We know this does not cover ALL of the standards but it is what I feel we can get through in a school year and what they will be able to learn and retain.  Obviously I will add to it if need be, and this is just a list of topics (it does not indicate the difficulty level of the questions they will be given).

How do you organize your Geometry content?  What resources do you use to outline your course?

Thursday, June 26, 2014

School Supply Craziness

For any of you who already use the interactive notebooks in your classrooms you already know this, but for those who are just starting, a good amount of school supplies are needed on a regular basis to complete each of the pages.

These supplies are the ones my students use on a regular basis:

     ~ Markers (thin and thick)
     ~ Colored Pencils & Sharpener
     ~ Crayons
     ~ Highlighters (6 different colors)
     ~ Glue Stick
     ~ Tape
     ~ Ruler, Compass, Protractor
     ~ Scissors


First Year Supply Organization:

In my classroom I have these AMAZING cabinets that have all of these bins.  Each bin has it's own specific item that goes in it and each bin is labeled. 


Whenever we were working on putting a page together I would take out ALL of the bins that we needed and set them on my supply table.


So why didn't this method work?

#1: This way took up a lot of my time throughout the day, each of my 3 math classes on any given day could be using different supplies so I would have to change them out constantly. So instead of greeting students as they came into the room I was spending my time getting the supplies ready.

#2: Students would always forget to grab all of the supplies that they needed, so they would get up to get what they forgot during the lesson and would lose out on instruction.


Second Year Supply Organization:

After my first year I did a lot of reflecting on the interactive notebook, my pages, the process, distribution, etc.  The supply organization/distribution was enough to quit doing the notebooks but I knew they were working for my students.  So I found a different way to get organized.

I wanted to get some sort of bin that all of the supplies we use could go into but stay neat and organized.  I went out looking for a shower caddie because I knew they had sections.  I found these ones at Walmart for $0.95 each over the summer when they had the college stuff out.

This is what each of the bins look like after the supplies were added.  Each table (groups of 4-5 tables) had one and the students shared supplies. 

These worked out so much better then the larger bins.  The most difficult part was making sure the students kept them organized.  After me nagging them about keeping them clean they learned it was better to just do what I wanted then having to listen to me.


What I liked about this the most was that students NEVER had to get up out of their seat to get supplies, no more forgetting and no more loss of instruction. 


Sunday, September 8, 2013

Transformations

It has been a long time since I've written a post that I hope I still have readers?  I have so many posts to write to wrap up last school year. Hopefully I can get them all done in the next week or two, because I have so many exciting new things about THIS school year to report on! (We just finished week 3 of the 2013-2014 school year)

Mid year last year we did transformations in Geometry, but since I know it's a huge portion of CCSS for Geometry this year, I thought I would write about what we did since many are starting this school year off with it.

This page of our Geometry ISN covered Reflections, Rotations, and Translations.  The left page went over what each of them meant and had an example.

The right side had the definitions along with a practice problem for each type.

The students easily caught on to Reflections and Translations, but had a more difficult time with Rotations.  To get students to understand how rotations work and why a shape ends in the position it does took some time.
To help them see how shapes rotate I gave them the graph paper in the pictures and we drew different shapes on each graph.  I then gave them each a blank transparency and Vis-A-Vis marker.  Students placed the transparency over their graph paper, and traced the shape with the Vis-A-Vis marker. They would put their finger on the point of rotation and then rotate the transparency the correct number of degrees and in the correct direction.  The outline on the transparency shows the students where the shape will end up.  Then they would draw the shape on the graph paper.  After doing the four on the page, they felt a lot more comfortable with rotations.  Some no longer needed the transparency to do the work, while others relied on it a little longer.  By the end they were doing rotations without any problems.

Thursday, May 2, 2013

Angle Sum Theorem

I've taught Angle Sum Theorem in the past but I felt as though my students didn't truly understand what it means or how it actually works.  They can tell you that all angles in a triangle add up to 180 degrees, but if you ask them how do you know it's true they couldn't give you a good reason.  I usually get the response of "because you told us it does".  UGH!  Not the response I'm looking for.

This year I was determined to find a way that would help them understand just how it worked, and I came across these two different methods.  I used BOTH.

The first method is where you give students three different triangles: Equilateral, Scalene, and Isosceles.  They color each of the angles in the triangle a different color and rip off the angles.  Then they have to join all three angles, and in the end they form a straight line which they know measures 180 degrees.

The second method we used is where each student again is given three different triangles: Equilateral, Scalene, and Isosceles.  They again color each of the angles in the triangle a different color.  They start off by folding the triangle to create an altitude. Then the top angle is folded down to the point where the altitude and base meet.  The two other angles fold in, showing all three angles lined up creating a straight line.

They liked the folding method because when they glued them into their ISN they were able to fold and unfold the triangle as many times as they want.  The ones that were ripped could only be done the one time.


Here are the left pages when they are finished.  
Unfolded Triangles
Folded Triangles

On the right side of their notebook we worked out several different types of problems involving the angle sum theorem.  We also revisited supplementary angles, vertical angles, as well as the different types of triangles and their characteristics.

Overall this page so far has probably been their favorite.  I succeeded in getting them to understand why the angles in a triangle add up to 180 degrees, and I no longer get answers of "because that's what you said".

Tuesday, April 30, 2013

Naming Triangles

We moved into Triangles in Geometry class and we began by naming them, using both the name based on their sides as well as the name based on their angle measures.

The students were given a sheet that contained all 9 triangles.  They had to cut them out and then sort them into groups based on their similarities.  At this time they were not given any of the names.  Students had to explain why they grouped certain triangles together.  They were also told that one triangle could not fit into more than one group.  This proved to be a challenge for some of them, but after awhile they were able to figure it out.

Everyone came up with that we could group them based on their sides, or by the types of angles.  We decided as a whole class to glue them into our ISN by groups based on their sides.

We went through the six different names for triangles and what the characteristics were for each of them.  After that they were asked to go back and name each yellow triangle using two names.

When they were done they were given this half sheet of practice and asked to go through it.  I had them start off on their own, only working through the first three at the top.  After that we went over them and I had them work in pairs for the bottom section.

Many of my students used different colored highlighters to make each of the triangles in questions #1-5 stand out so they knew which ones to focus on.

Under this page is where my students wrote down the six different triangles: acute, right, obtuse, equilateral, isosceles, and scalene.  They also were asked to summarize the characteristics of each one.


Friday, April 26, 2013

Characteristics of Trapezoids

When we covered characteristics of trapezoids I wanted to make our ISN page different than the rest that we have done.  I looked around at other teacher's blogs to see what kind of cool ideas they were doing and I saw a post that had a page with a pocket on it.  I LOVE the pocket idea!

<~This is what our page looked like when it was completed.  We covered the three different kinds of trapezoids: Isosceles, Right and Scalene.

To make the pocket I gave students a regular size index card that we taped on three sides.  To make the cards the students cut out the green boxes and glued those onto the regular size index cards as well.


Each type of trapezoid got their own card, which we colored equal angles the same color and identified characteristics about their sides.

I had the students use protractors to measure each of the angles in the trapezoids to determine which ones were equal to each other and then color them.  After that we wrote the characteristics of the angles down under the characteristics section. We then began talking about the sides, some students needed to use rulers to measure the lengths because visually they weren't sure which ones were equal.

We then started discussing what equations that we could come up with for each of the trapezoids.   What we came up with we wrote under the equations section.

They then were given a green sheet that had problems involving trapezoids on them.  Students had to cut them out, then decide which problem belonged with which type of trapezoid.

Once they match up the problem with the type of trapezoid they glued them onto the back of the card.   Using the characteristics and equations they discovered on the front, they had to solve the problems on the back.

When they were finished we went through them together and they were given their practice for the right page.


Here is their practice page on the right. ~>


Friday, April 5, 2013

Quadrilaterals

So I thought over spring break I would catch up on all of my blogging, find cool new activities to do with my math students, and create some new ISN pages.  Well needless to say that never happened...

We covered Quadrilaterals in Geometry class, however we only went with regular quadrilaterals for the time being.

My students love charts, and when I say love I really mean LOVE!!  It's weird how excited they can get about a chart, but whatever will make them happy.  So to cover the characteristics of the different types of regular quadrilaterals I had my students fill in the following chart.


We started off drawing a picture of each shape and from there the students told me what to write in both the "Angles" and "Sides" boxes.  It turned into a whole class discussion where all I did was fill in my chart as they told me what to put in it.

My students will admit that they are not the best artists (frankly neither am I ), so made these shapes on the computer for them to cut out and tape into their notebooks.  Students used rulers and protractors to help them figure out what angles and sides were congruent. As they discovered characteristics of the quadrilaterals as a class we wrote the information below and to the side of each of the shapes.  We did go through in the beginning identifying each of the shapes by name, then color coding their different characteristics (color chart at the top) that they had discovered through their exploration of the 6 quadrilaterals.


**Update: Both pages have been change to reflect the correct information for Kite**


Thursday, December 27, 2012

Geometry ISN

Since I started using an ISN in my Algebra class I have seen my students succeed to higher levels/expectations than I ever thought were possible at the beginning of the year.  In the mean time I saw the levels of my Geometry students progressively drop as the semester was going by.

At the beginning of every period I ask my students a journal question in which they are to reply to, we use blogger for this.  One day I asked my Geometry students to reflect on their learning and the type of student they are.  These are the following questions I asked them:
  • What do you need to do as a student in Geometry class to be successful?  
  • What have you been doing so far this school year that hasn't been working for  you?  
  • What have you been doing so far this school year that is working for you?   
The number one thing my students replied with was they don't know how to take proper notes and they lack organizational skills.  It was like the clouds opened up and the sun was shining down on us that day.  I instantly knew that they desperately needed the ISN too.

That night on my way home from work I stopped by my favorite store, Target, and picked up composition notebooks for each of my Geometry students.  The next day when the kids came in and saw all of the supplies out on the table some were excited because they have friends in my Algebra class and knew what was going on, while others were just plain old confused.

I explained what we were doing and why we were doing this.  They were all excited to try something new.  In fact at the end of the period one of my students approached me and said "Ms. O this is a pretty cool project you have us working on."

This is the cover I created for my Geometry ISN.


Numbers Important to Me! Numbers Important to Me! #2

Wednesday, October 24, 2012

Sorting Activities

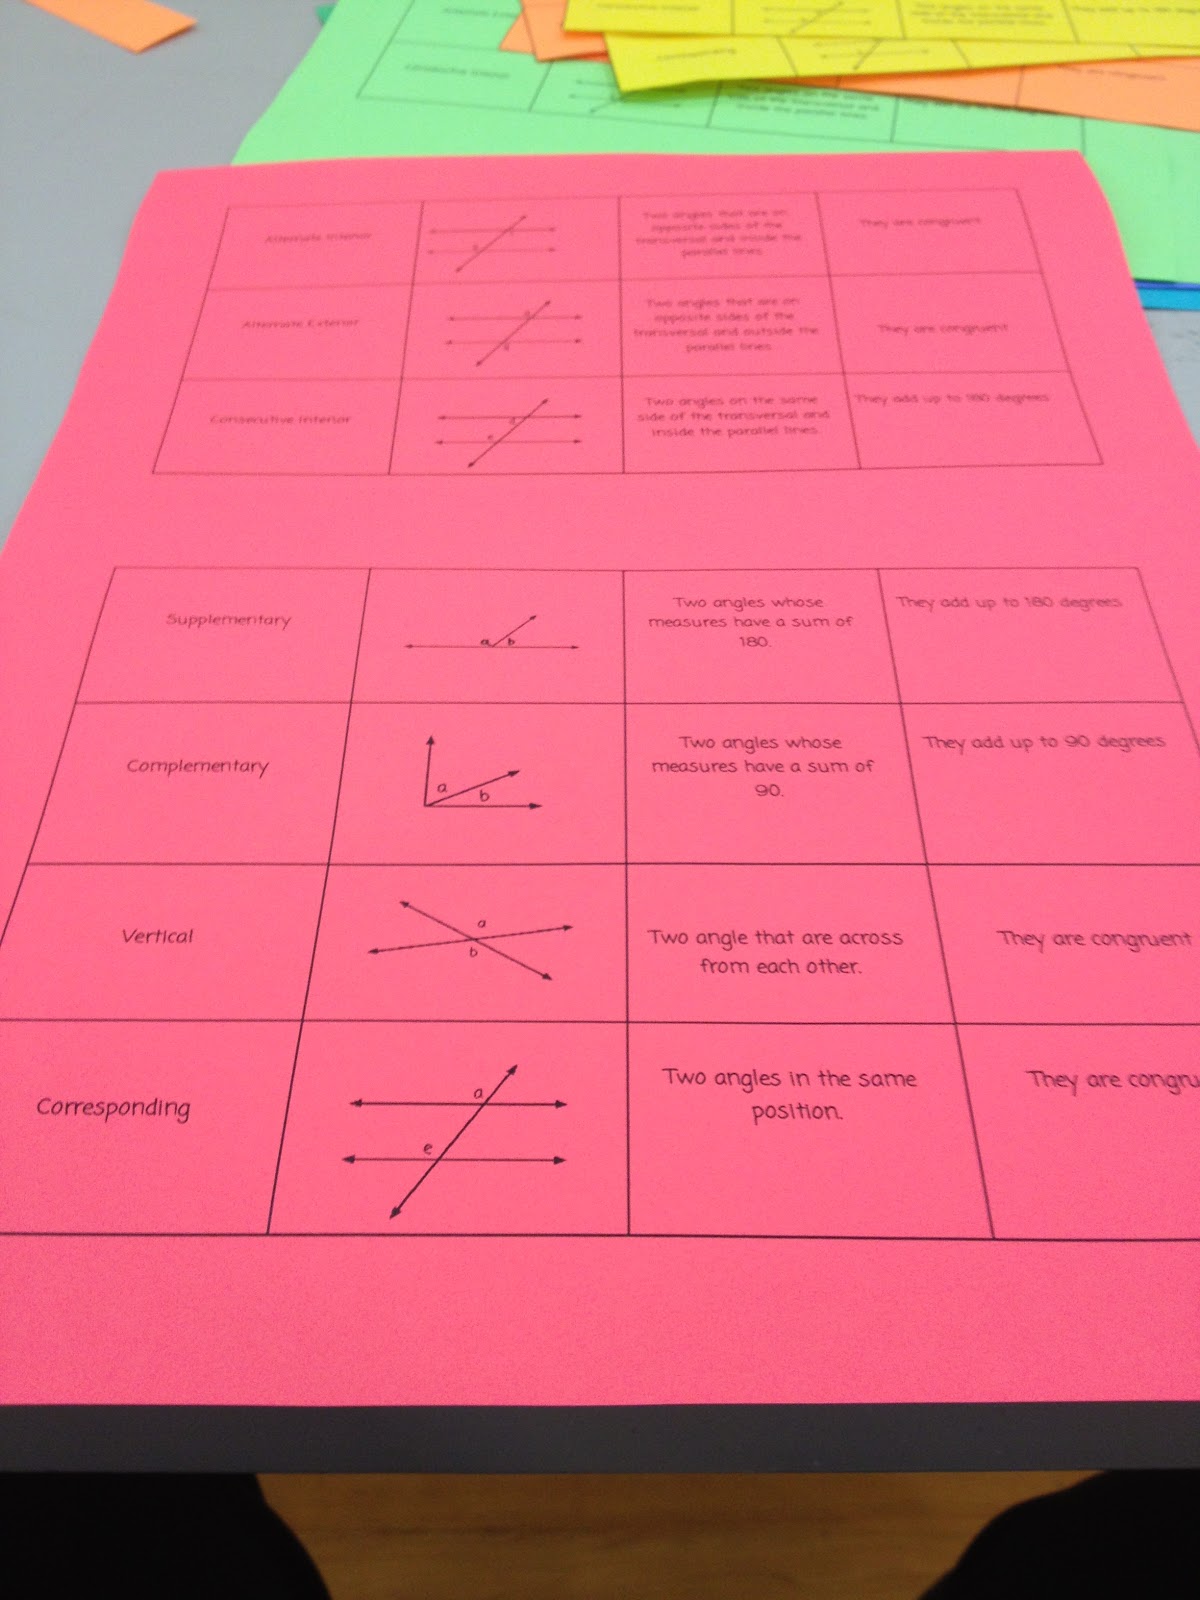
One of my favorite things to have the students do to help them memorize information is to create a sorting activity. I will have them do the sorting activity a few times through out the unit to help them remember the information.

I start off by creating a document with a table.  In this case I created an activity to help my students learn the different angle pairs in Geometry.  One box is the name, another is a picture/example, next is the definition, and the final box is the relationship.

Once I am finished typing it up, I copy it on different colored sheets of paper, cut them up and paper clip them together.  Sometimes I have them laminated so that they can be used over and over again.

The colored paper in my book is a MUST!  Often my students will drop a piece on the floor and when they are colored it's easier to know which clip they belong in.  I use to do them on white paper but would spend a lot of time trying to figure out which clip the dropped piece would belong in.


I have created problem sorts as well where one card had a math problem and the other one had the answer. These were usually like 10 problems long. It allows students to get immediate feedback to see if they are doing it correctly.  They know it was done correctly if they can find their answer, otherwise they know to go back and work it out again.

 Another sort I have made was on the scientific method.   One half of the table was the steps and the other side was a part of a lab write up that I broke down into parts.  The students had to read the part of the lab and determine which step that was. 

Sorts can be used for so many different topics...Parts of a story, Historical Events with their causes and effects, cooking equipment with their names, lab equipment with their names, etc.

If you use sorts please share your ideas!

Tuesday, October 2, 2012

Drawing on the Windows

So we have been in school since the middle of August and every day I'm trying to find new ways to keep my students engaged.  The other day I decided that instead of using the whiteboards or the SMART board I would use the 6 giant windows that I have in my classroom.

My Geometry class is currently working on solving for the missing angles using our awesome Algebra skills! We are focusing on complementary and supplementary angles.

I drew six different problems ranging in difficulty level as you move down the line of windows. Immediately when my students came in the door they saw the drawings on the windows...How I don't know cause they are hard to see until till you get up close.  They had a great time solving each of the problems and asked if they could draw on the windows too.  I decided to have them come up with their own problems and work them out, just to make sure they worked out in the end.  I wanted them to create problems where none of the angles were given, and where each angle contained variables.  This way they had to solve for the missing variable first and then plug it in to find the measure of each angle.

Many of them complained at first saying "This is to hard" but after a few minutes they began to make a game out of it, seeing who could come up with the hardest problem. It took many of them about 15 minutes to come up with their own, but they were excellent problems and they were proud of themselves.  So after checking each of their problems I let them draw them up on the windows. (You can see two of their examples below).

It's a little hard to see but the problem is 5x +4, x-2, and 3x +7.  Courtesy of a student.

Sorry for the store shed being in the way but this problem was 3x, 4x, and 3x.  Again courtesy of a student.


It was probably one of the best days in class that we have had in about a week and as the day went on other classes were upset that they didn't get to do math on the windows.

All that we used were Expo dry eraser markers to draw on the windows, and they easily come off with a rag.  If it gets dry, like mine did because it sat over night, a little windex takes them write off.

Related Posts Plugin for WordPress, Blogger...